
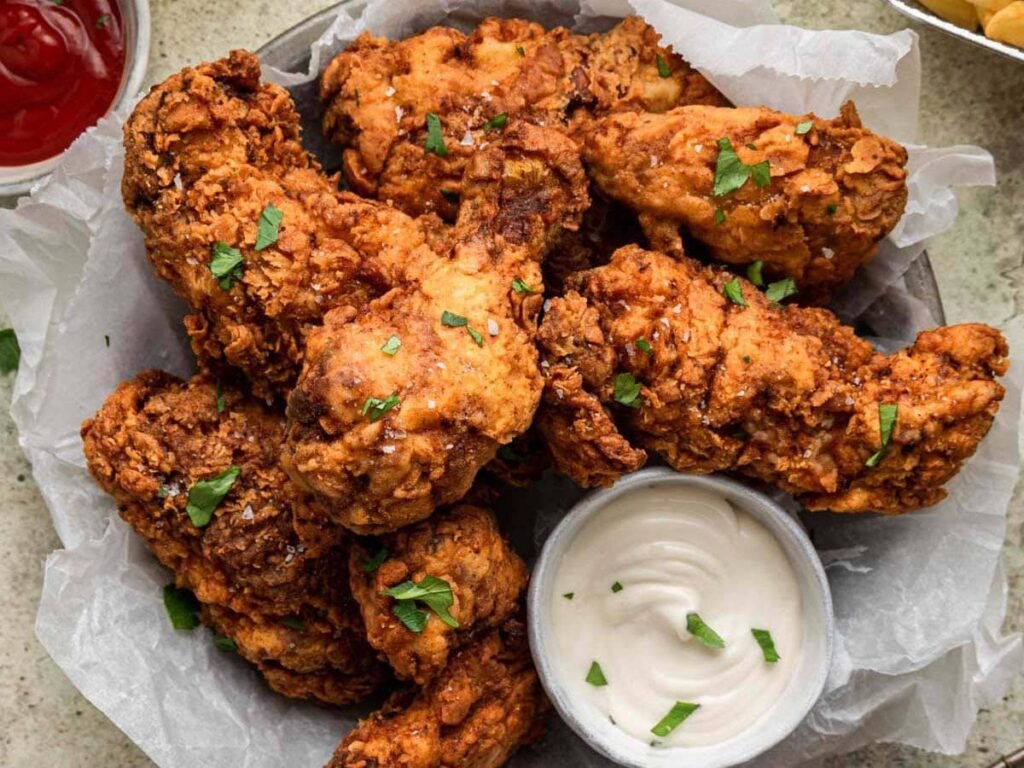
Welcome to ForknFood.com, your go-to destination for mouthwatering recipes that bring the joy of home cooking to your kitchen. Today, we’re diving into a classic comfort food that’s beloved around the world: fried chicken. But not just any fried chicken—this is our ultimate Crispy & Juicy Fried Chicken Recipe that’s guaranteed to outshine your favorite takeout joint. Imagine biting into a piece where the exterior shatters with a satisfying crunch, giving way to tender, succulent meat bursting with flavor. No more soggy skins or dry interiors; this recipe delivers perfection every time.
Whether you’re hosting a family gathering, planning a picnic, or simply craving something indulgent, this fried chicken will become your new staple. We’ve drawn inspiration from tried-and-true methods shared by culinary experts, ensuring it’s easy to follow even for beginners. Let’s explore the history, the science behind the crispiness, and of course, the step-by-step guide to making it at home.
The Rich History of Fried Chicken
Fried chicken has a storied past that spans continents and cultures. Its origins can be traced back to Scotland, where frying chicken in fat was a common practice as early as the Middle Ages. However, it was in the American South where fried chicken truly evolved into the icon we know today. Enslaved West Africans brought their expertise in seasoning and frying techniques, blending spices like paprika and garlic with the Scottish method to create a dish that was flavorful and practical for preservation.
By the 19th century, fried chicken had become a symbol of Southern hospitality, often served at church picnics and family reunions. Fast-forward to the 20th century, and entrepreneurs like Colonel Sanders popularized it globally through Kentucky Fried Chicken (KFC). But homemade versions, like the ones perfected in home kitchens, always reign supreme. According to food historians, the secret to superior fried chicken lies in the brine or marinade, a technique that ensures moisture retention during frying.
In modern times, variations have emerged worldwide. In Korea, for instance, “yangnyeom” fried chicken is coated in a sweet and spicy sauce, while in Japan, “karaage” uses soy sauce and ginger for a lighter bite. Our recipe sticks to the Southern roots but incorporates tips for extra crispiness, making it versatile for global palates.
For more on the cultural significance of comfort foods, check out our internal link https://forknfood.com/ article on Southern Soul Food Classics.
Why Homemade Fried Chicken Beats Takeout Every Time
Takeout fried chicken might be convenient, but it often falls short in quality. Greasy coatings, overcooked meat, and inconsistent seasoning are common complaints. Homemade allows you to control every aspect: the freshness of ingredients, the oil temperature, and the spice levels. Plus, it’s more economical—feeding a family of four for under $20 versus $30+ from a chain.
Health-wise, while fried chicken isn’t a diet food, making it at home lets you choose better oils like peanut or canola, which have higher smoke points for cleaner frying. You can also opt for organic chicken to avoid antibiotics and hormones found in mass-produced poultry. Studies show that brining chicken not only enhances flavor but also reduces the absorption of oil, leading to a less greasy final product.
Environmentally, home cooking reduces packaging waste from takeout containers. And let’s not forget the satisfaction of creating something from scratch—it’s therapeutic and impressive!
If you’re new to frying, don’t worry; our guide includes safety tips to prevent splatters and fires. For alternative healthier options, explore our Oven-Baked Crispy Chicken Wings recipe.
Ingredients for the Perfect Fried Chicken
To serve 4-6 people, you’ll need:
For the Brine/Marinade:
- 1 whole chicken (about 3-4 lbs), cut into 8-10 pieces (drumsticks, thighs, breasts, wings)
- 2 cups buttermilk (or substitute with milk + 1 tbsp lemon juice)
- 1 tbsp hot sauce (like Tabasco for a kick)
- 1 tsp salt
- 1 tsp black pepper
- 1 tsp garlic powder
- 1 tsp onion powder
For the Dredge:
- 2 cups all-purpose flour
- 1/2 cup cornstarch (for extra crispiness)
- 1 tbsp baking powder (creates air bubbles for crunch)
- 2 tsp paprika
- 1 tsp cayenne pepper (adjust for heat)
- 1 tsp dried thyme
- 1 tsp salt
- 1 tsp black pepper
For Frying:
- Vegetable oil or peanut oil (enough to fill a deep pot 3-4 inches deep)
- Optional: Herbs like rosemary for infusing the oil
These ingredients are pantry staples, but for premium quality, source your chicken from local farms. External link: Learn more about sustainable poultry at USDA’s Poultry Guidelines.
Step-by-Step Instructions
Step 1: Brine the Chicken
In a large bowl, combine the buttermilk, hot sauce, salt, pepper, garlic powder, and onion powder. Add the chicken pieces, ensuring they’re fully submerged. Cover and refrigerate for at least 4 hours, ideally overnight. This step tenderizes the meat and infuses flavor, making it juicy.
Step 2: Prepare the Dredge
In another bowl, whisk together the flour, cornstarch, baking powder, paprika, cayenne, thyme, salt, and pepper. This mix creates a feathered, crispy coating.
Step 3: Dredge the Chicken
Remove chicken from the marinade, letting excess drip off. Dip each piece in the flour mixture, then back into the marinade, and again in the flour for a double coat. Shake off excess. Let sit on a wire rack for 15-20 minutes to set the crust.
Step 4: Fry to Perfection
Heat oil in a deep pot or Dutch oven to 350°F (use a thermometer for accuracy). Fry in batches, 3-4 pieces at a time, for 12-15 minutes, turning halfway. Dark meat takes longer than white. Internal temperature should reach 165°F. Drain on a wire rack over a baking sheet.
Step 5: Rest and Serve
Let the chicken rest for 5 minutes to redistribute juices. Serve hot!
Pro tip: Maintain oil temperature between 325-350°F to avoid sogginess or burning.
Tips for Achieving Maximum Crispiness
- Use Cornstarch: It inhibits gluten formation, leading to a lighter, crispier crust.
- Double Dredge: This builds layers for that signature crunch.
- Oil Choice: Peanut oil has a high smoke point and neutral flavor.
- Don’t Overcrowd: Frying too many pieces drops the temperature, causing greasiness.
- Post-Fry Seasoning: Sprinkle with sea salt right after frying for enhanced taste.
- Avoid Moisture: Pat chicken dry before marinating to prevent steaming.
Common mistakes: Skipping the brine or using low-heat oil. For troubleshooting, see our Frying Basics Guide.
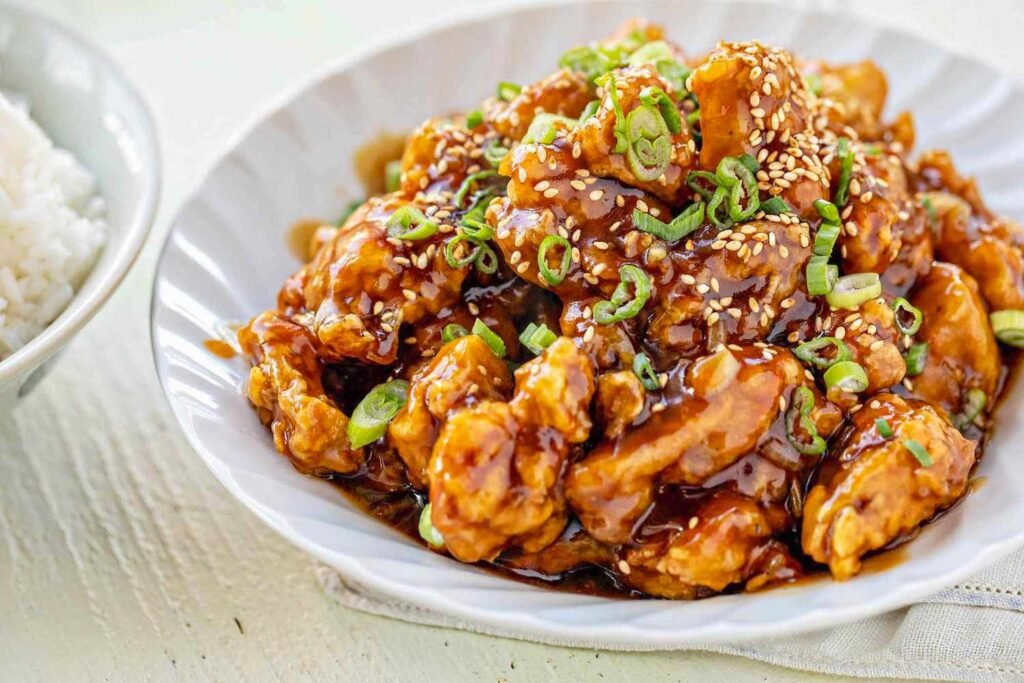
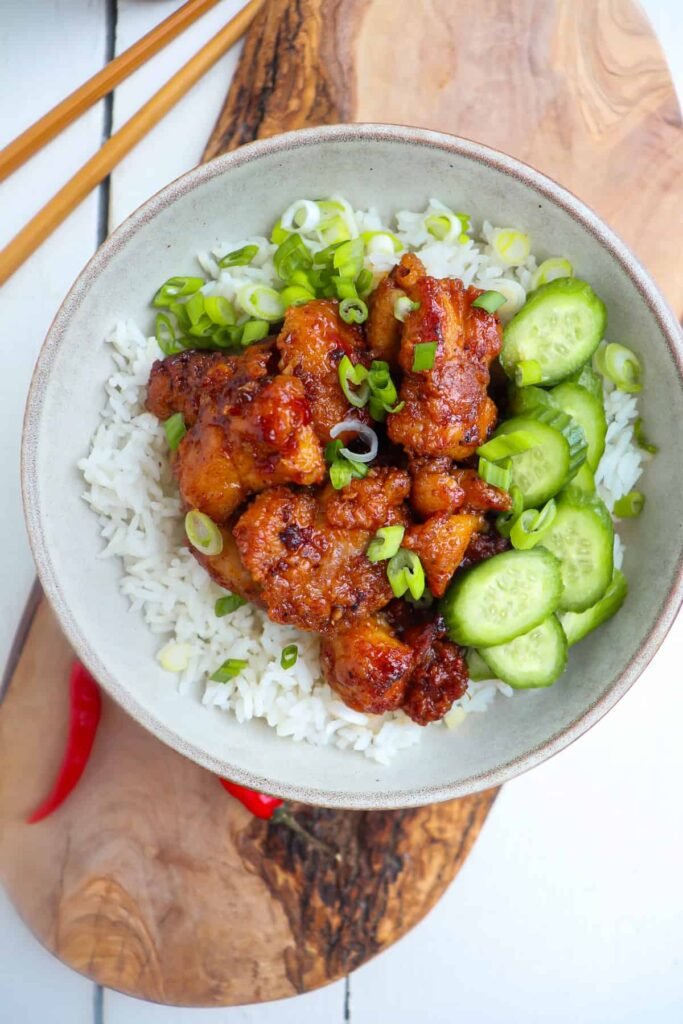
Delicious Variations to Try
- Spicy Version: Add more cayenne or serve with buffalo sauce.
- Herb-Infused: Mix fresh herbs into the dredge.
- Gluten-Free: Swap flour with rice flour or almond meal.
- Asian Twist: Marinate in soy sauce and ginger, then coat in panko.
- Healthy Bake: After dredging, bake at 400°F for 40 minutes, flipping halfway.
Pair with our Korean-Inspired Kimchi Slaw for a fusion meal.
Serving Suggestions and Pairings
Fried chicken shines with classic sides like mashed potatoes, coleslaw, or biscuits. For a picnic, add corn on the cob and watermelon. Dipping sauces: Honey mustard, ranch, or homemade gravy.
Wine pairing: A crisp Chardonnay cuts through the richness. For non-alcoholic, try iced tea.
Host a fried chicken party? Check external inspiration from AllRecipes’ Fried Chicken Ideas.
Nutritional Information
Per serving (2 pieces): Approximately 450 calories, 25g protein, 30g fat, 20g carbs. It’s indulgent, but portion control helps. Brining adds sodium, so use low-sodium options if needed.
For lighter alternatives, our site offers Air Fryer Chicken Tenders.
Frequently Asked Questions
How long can I store leftovers? Up to 3 days in the fridge. Reheat in the oven at 350°F for crispiness.
Can I use boneless chicken? Yes, but adjust frying time to 8-10 minutes.
What if I don’t have buttermilk? Yogurt thinned with milk works.
Is this recipe kid-friendly? Absolutely—tone down spices for milder taste.
Why is my chicken not crispy? Likely oil too cool or overcrowding.
For more FAQs, visit our Recipe Troubleshooting Section.
Conclusion: Elevate Your Home Cooking Game
There you have it—our Crispy & Juicy Fried Chicken Recipe that’s truly better than takeout. With its golden crust, tender interior, and bold flavors, it’s a dish that brings people together. Experiment, enjoy, and share your results on social media tagging @ForknFood.
Ready for more? Browse our Chicken Recipes Collection or external site The Country Cook’s Southern Recipes. Happy frying!
Expanded Frequently Asked Questions
Why does my breading fall off during frying?
This is a super common issue! The breading often detaches because the chicken wasn’t patted dry before dredging, the double-dredge wasn’t pressed firmly enough, or the coated pieces didn’t rest long enough (15-30 minutes) to set the crust. Skipping the rest step means steam from the meat pushes the coating away. Solution: Pat chicken very dry, press the flour mixture in well, and always let it rest on a wire rack before frying.
What if my fried chicken turns out greasy or soggy?
Usually, this happens when the oil temperature is too low (below 325-350°F), causing the chicken to absorb more oil instead of crisping up. Overcrowding the pot drops the temperature further. Old or reused oil can also make it greasy and off-tasting. Fix: Use a thermometer religiously, fry in small batches (3-4 pieces max), and start with fresh, high-smoke-point oil like peanut or vegetable. Drain on a wire rack, not paper towels, to keep the bottom crisp.
Can I make fried chicken ahead of time or reheat it?
Yes, but for best results, fry it fresh. If prepping ahead, fry fully, cool on a rack, then store in the fridge up to 2 days. Reheat in a 375°F oven on a wire rack for 10-15 minutes to restore crispiness—avoid the microwave, as it turns the coating soggy. For freezing, fry, cool, freeze on a sheet pan, then bag; reheat from frozen in the oven.
Is buttermilk absolutely necessary, or can I substitute?
Buttermilk is ideal for tenderness and tang (its acidity tenderizes the meat), but if you don’t have it, mix 2 cups milk with 2 tbsp lemon juice or white vinegar and let it sit 10 minutes to mimic buttermilk. Yogurt thinned with water or even regular milk works in a pinch, though the flavor and tenderness won’t be quite as spot-on.
How do I know when the chicken is fully cooked without cutting into it?
Use an instant-read thermometer—insert it into the thickest part (avoiding bone) for 165°F. Dark meat (thighs/drumsticks) often needs 12-15 minutes, while white meat (breasts) cooks faster (10-12 minutes). If no thermometer, cut near the bone; juices should run clear, not pink.
Can I use an air fryer or oven instead for a healthier version?
Absolutely! For air fryer: Spray coated chicken with oil, air fry at 375-400°F for 20-25 minutes, flipping halfway. For oven: Bake breaded chicken on a wire rack at 400°F for 40-50 minutes, flipping once. It won’t be quite as shatteringly crisp as deep-fried, but it’s close and way less oily. Check our Air Fryer Chicken Tenders for a similar method.
Why add cornstarch or baking powder to the dredge?
Cornstarch lightens the coating and prevents excess gluten development for extra crunch. Baking powder creates tiny air bubbles when it hits hot oil, giving a bubbled, feathery texture. Skip them for a denser crust, but they’re game-changers for that “better than takeout” snap.
What oil is best, and can I reuse it?
Peanut oil is top-tier for its high smoke point (around 450°F) and neutral flavor, but canola or vegetable oil works great too. Reuse only 2-3 times max if filtered and not burnt-smelling—strain through cheesecloth after cooling. Discard if it darkens, foams, or smells rancid.
These FAQs address the most frequent pain points home cooks face, helping readers avoid frustration.
Recommended Products and Tools
To make your fried chicken experience smoother and more pro-level, here are some essential kitchen tools and products. These recommendations focus on reliable, home-cook-friendly items that help with safety, consistency, and crisp results.
- Dutch Oven or Heavy Pot — A 6-8 quart enameled cast iron Dutch oven (like Le Creuset or a budget-friendly Lodge/Cuisinart version) is perfect for even heat distribution and containing splatters. High sides prevent oil overflow.
External link: Check options on Amazon’s Dutch Oven Picks. - Deep-Fry/Candy Thermometer (Clip-On) — Essential for maintaining 325-350°F. A clip-on model stays in the pot hands-free.
Pro tip: Avoid guessing—temperature control is the #1 secret to non-greasy chicken! - Instant-Read Thermometer — For checking internal chicken temp (165°F). Digital models like ThermoPro or ThermoWorks are fast and accurate.
- Spider Strainer or Slotted Spoon — A long-handled spider (fine-mesh basket) is ideal for safely lowering/ removing chicken and draining excess oil. Better than tongs for delicate handling.
External link: Popular affordable ones on Amazon Spider Strainers. - Tongs (Long, Sturdy Pair) — OXO Good Grips 12-inch tongs are great for flipping and transferring without splatters.
- Wire Cooling Rack + Rimmed Baking Sheet — Set the rack over the sheet for draining post-fry—air circulates to keep the bottom crisp (no soggy spots from paper towels).
- Peanut Oil or High-Smoke-Point Oil — Stock up on a large jug for multiple uses.
- Brining Container — A large food-safe bowl or zip-top bag for overnight marinades.
These tools turn a potentially messy process into something confident and repeatable. Many are one-time investments that pay off for other frying recipes too.
For more gear inspiration, see our internal guide on Essential Kitchen Tools for Frying.
Feel free to integrate these into your article—perhaps expand the FAQs section and add a new “Recommended Tools & Products” subsection near the end. This boosts SEO with practical value and encourages readers to shop or explore more on your site! Let me know if you’d like the full updated article text.
Top Deep Fryers for Homemade Fried Chicken
A dedicated electric deep fryer takes the guesswork out of oil temperature and splatter control, making it ideal for batches of chicken.
- Breville Smart Fryer — Often ranked as the best overall in 2025-2026 tests for its digital controls, excellent heat recovery (minimal temp drops when adding cold chicken), and even frying results. Great for juicy interiors and shatteringly crisp exteriors without much oil absorption. Perfect for family-sized batches.
External link: Breville Smart Fryer on Amazon - All-Clad 3.5-Liter Deep Fryer — Premium pick praised for superior performance in frying chicken—consistent temps, easy cleanup, and pro-level results. Ideal if you fry often and want restaurant-quality crunch.
External link: All-Clad Deep Fryer on Amazon - Chefman 4.5-Liter Deep Fryer — Best budget-friendly option with a large capacity, removable parts for easy cleaning, adjustable temp/timer, and solid performance on fried chicken. Great value for beginners or frequent use.
External link: Chefman Deep Fryer on Amazon - Hamilton Beach Professional-Style Deep Fryer (various models, e.g., 4-5 liter) — Affordable, reliable analog controls, multiple baskets for frying chicken and sides together, and good heat maintenance. Popular for home cooks making wings or pieces.
External link: Hamilton Beach Deep Fryer on Amazon
If you prefer stovetop: A large enameled Dutch oven (6-7 quart, like Le Creuset or budget Cuisinart) remains a classic for even heating and high sides to contain oil—pair it with a clip-on thermometer.
Must-Have Accessories & Tools
These essentials make the process safer and more foolproof:
- Clip-On Deep-Fry/Candy Thermometer — Non-negotiable for maintaining 325-350°F. Clip-on models (e.g., from Taylor or CDN) stay in the pot hands-free.
External link: Search for clip-on deep fry thermometer on Amazon - Instant-Read Digital Thermometer (e.g., ThermoWorks Thermapen or similar) — For checking chicken internal temp (165°F) without guesswork. Fast and accurate.
External link: ThermoWorks Thermapen on their site - Spider Strainer/Skimmer — Long-handled fine-mesh basket for safely removing chicken and debris from oil—better control than tongs alone.
External link: Spider Strainer on Amazon - Long Stainless-Steel Tongs (12-inch, like OXO Good Grips) — For lowering/turning pieces without splatters. Get two pairs for dredging and frying.
- Wire Cooling Rack + Rimmed Baking Sheet — Essential for draining excess oil while keeping the bottom crisp (no soggy spots). Nordic Ware or similar sets work great.
Best Oil Recommendation
- Refined Peanut Oil — Top choice for fried chicken due to its high smoke point (~450°F), neutral-to-nutty flavor, and clean results. Brands like LouAna or Planters are widely recommended for home frying. Avoid if allergies are a concern—sub canola or vegetable. Buy in large jugs for cost savings and reuse (filter after cooling).
External link: Peanut Oil on Amazon
Integrate these into a new subsection like “Top Products to Level Up Your Fried Chicken Game” in your article. They add practical value, boost engagement (readers love gear recs), and can include affiliate links if your site supports them. For more, link to our internal Essential Frying Tools Guide.
Leave a Reply